
Using custom fields in Signature 365
If you need a field in Signature 365 that cannot be imported from Microsoft 365, you can create a custom field.
This can also be used to allow your staff to update a field within Signature 365 without requiring administrative permissions.
This feature can be used in a number of ways, for example displaying user pronouns or giving staff the option to display a specific field.
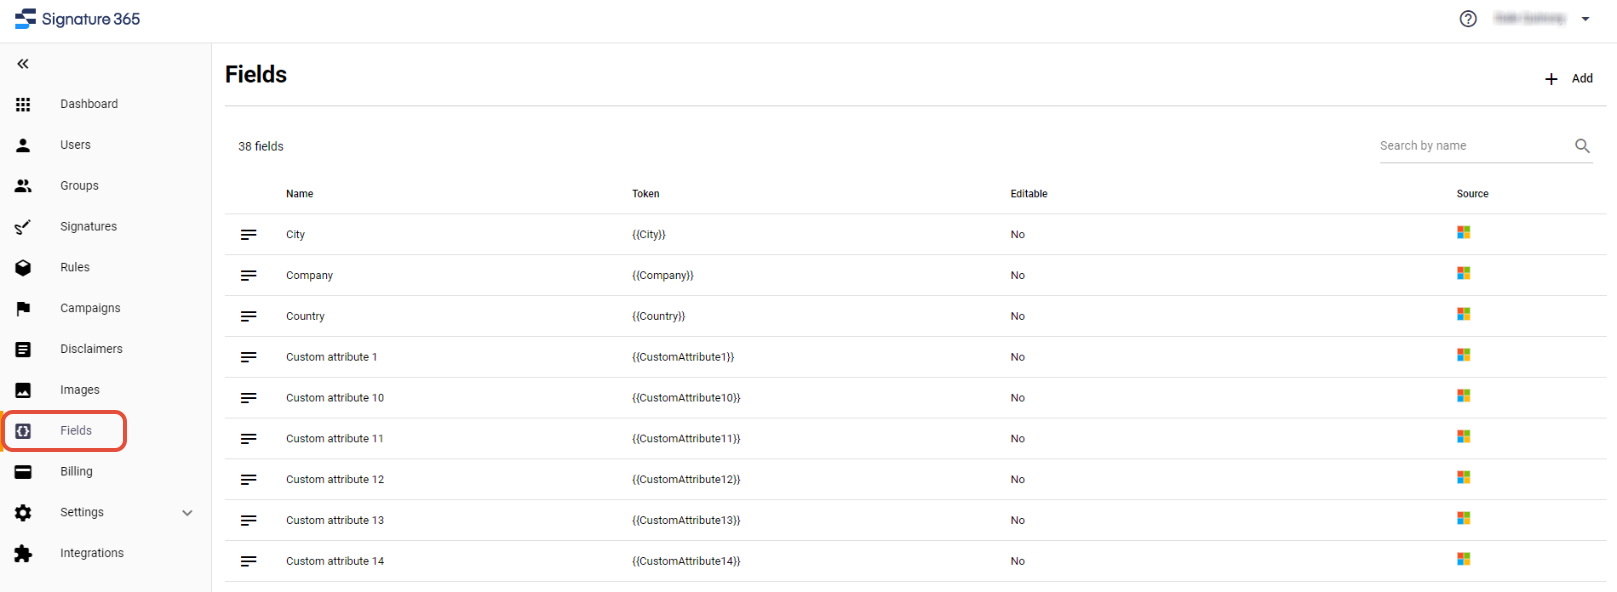
To create a new field, log in to Signature 365 and select the Fields option from the menu.
The Fields screen lists all imported fields from your Microsoft 365 tenant. The names of these cannot be changed.
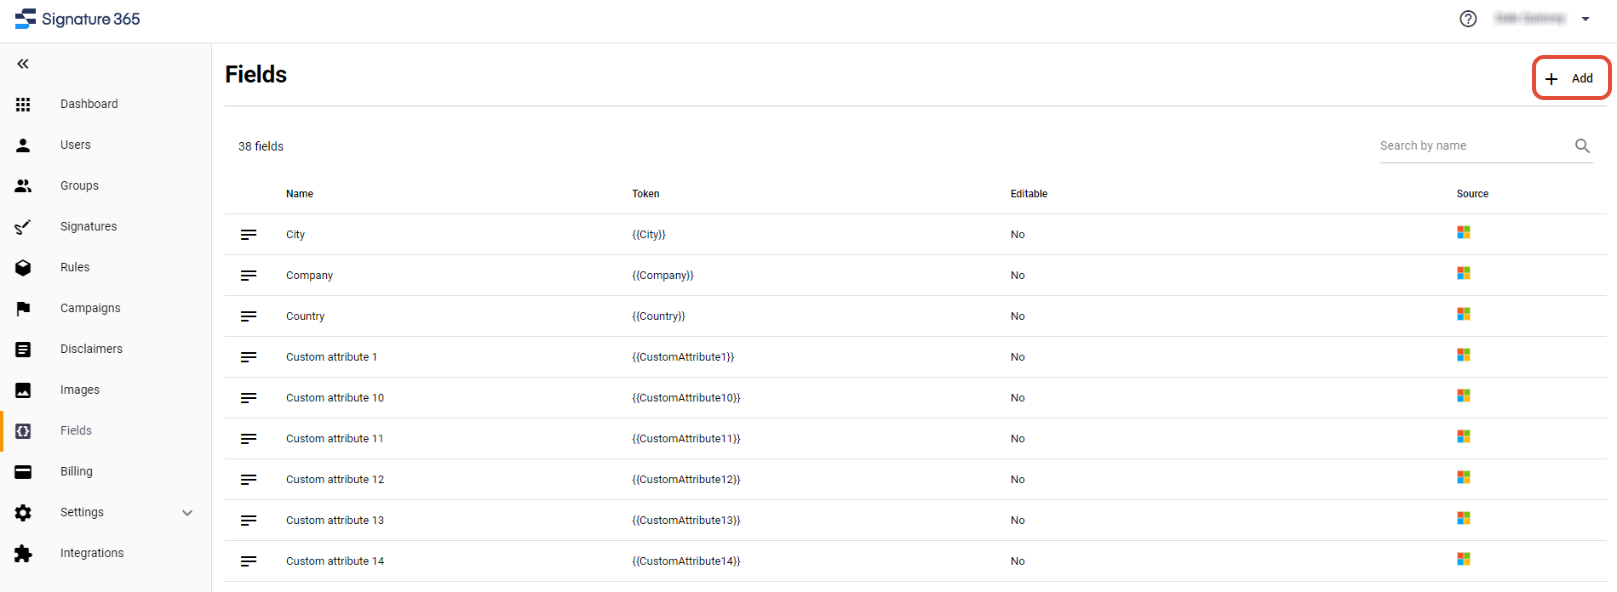
To add a new field, click the Add button in the top right-hand corner.
The create field screen will be displayed. Name the new field as desired, the Token field will be generated based on the name entered, this can be changed if desired.
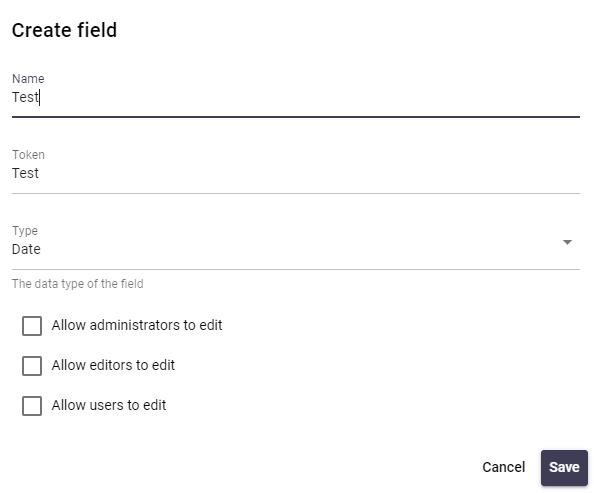
The Token field will define how you refer to the new field in a signature template, and will be named {{TokenName}}.
The Type field defines what type of data can be entered. Options are:
- Date - a date picker
- List - a defined list of options that can be chosen from
- Number - allows only number input
- Text - a free text field
- Yes/No
The options below select the type of user that can edit this field. Administrators can edit this field using the Signature 365 console.
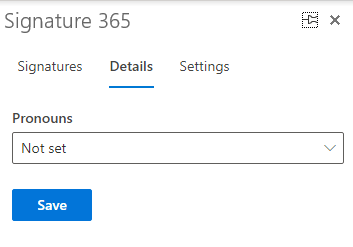
Allowing users to edit the field will allow this using the Details tab from the Signature 365 Outlook add-in.
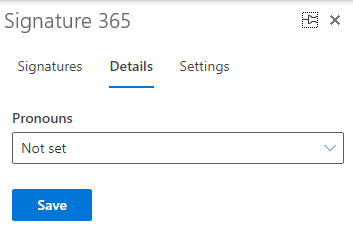
Once created, you can insert the new field in to a signature template using the same process as standard fields. Custom fields appear in the field picker under User defined fields.
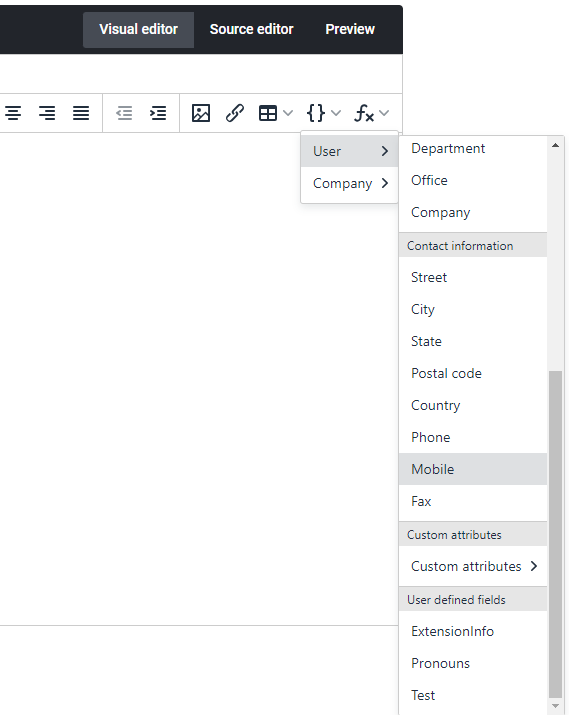
You can allow users the ability to set their pronouns by using a custom field by completing the following steps.
Create a Custom Field with the following details:
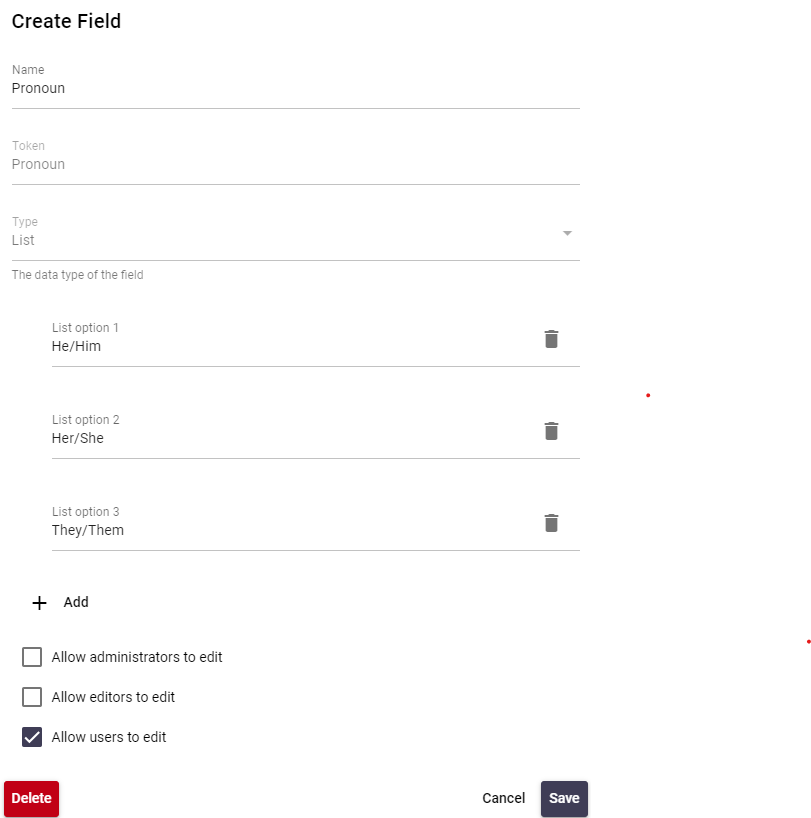
Insert the token from the above screenshot in the signature template where you would like this field to be displayed. This example wraps the token in a conditional statement.
{{if Pronoun}} ({{Pronoun}}) {{end}}
You can now change this field from the Outlook add-in, as detailed in the main article above.
The example below allows users to toggle display of the mobile number field in a signature. The concept is the same for any field.
Go to Fields > Add to create a new field with the following configuration options.
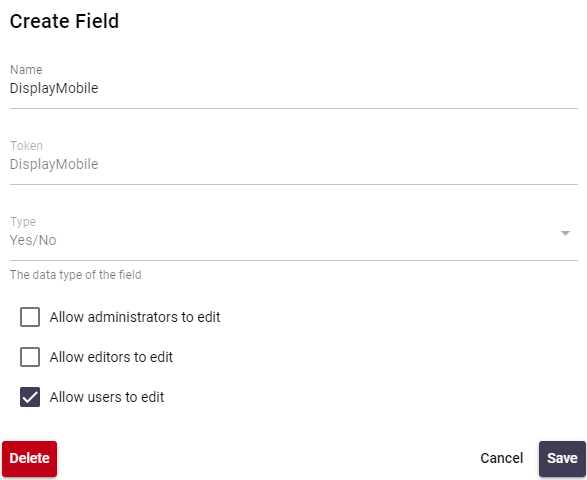
You must now update the signature template with a conditional test including this field where the mobile number should be displayed. In this example the mobile number should be displayed if both Mobile has a value and DisplayMobile is true:
{{if Mobile && DisplayMobile}} M: {{mobile}}
{{end}}
You can now change this option from the Outlook add-in, as detailed in the main article above. The Mobile field only displays when DisplayMobile is set to yes and the Mobile field has a value.
In some cases you may require text added to an individual users signature, for example a scheduled work pattern. You can use custom fields to achieve this by completing the following steps.
Create a Custom Field with the following details:
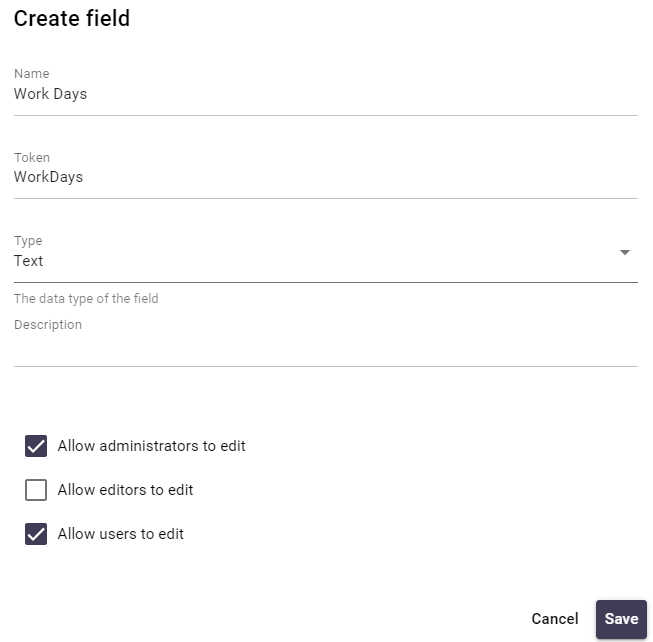
Insert the token from the above screenshot in the signature template where you would like this field to be displayed. In this example this is wrapped in a conditional statement to only display the value if it is present.
{{if WorkDays}} {{WorkDays}} {{End}}
You can now change this field from the Outlook add-in, as detailed in the main article above.
In some cases you may want to allow staff to enter a hyperlink to be used, for example a link to a LinkedIn page or a "Book a meeting with me" type link. This example shows a LinkedIn link, but the process is the same for a "Book a meeting with me" link.
Create a Custom Field with the following details:
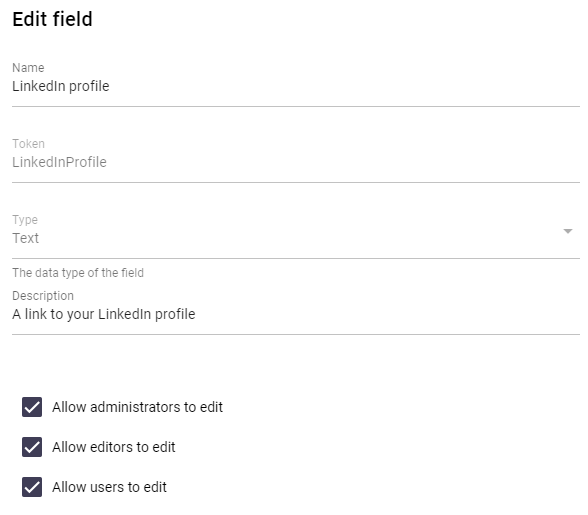
If you then wish to include this as part of a hyperlink you can edit the hyperlink (the same process for including hyperlinks on images) and insert the token for example:
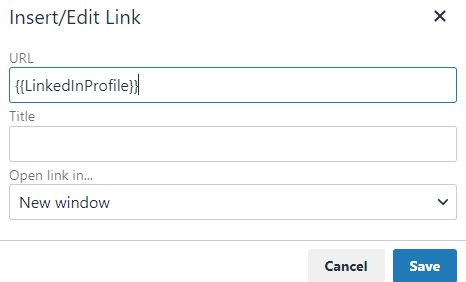
You will likely want to wrap the text/image with a conditional statement if the field is not blank (steps on this above).